Battle of Midway
Introduction
Between June 3 and 7, 1942, Japanese and American naval forces engaged in a sea and air battle near the Midway islands. For Japan, the attack and conquest of Midway was a requirement to both expand Japanese strongholds in the Pacific and at the same time to eliminate the US Pacific Fleet. Because the Americans managed to decipher Japanese military codes, The Battle of Midway resulted in an American victory and has since been viewed as a turning point in the Pacific War.
Prologue
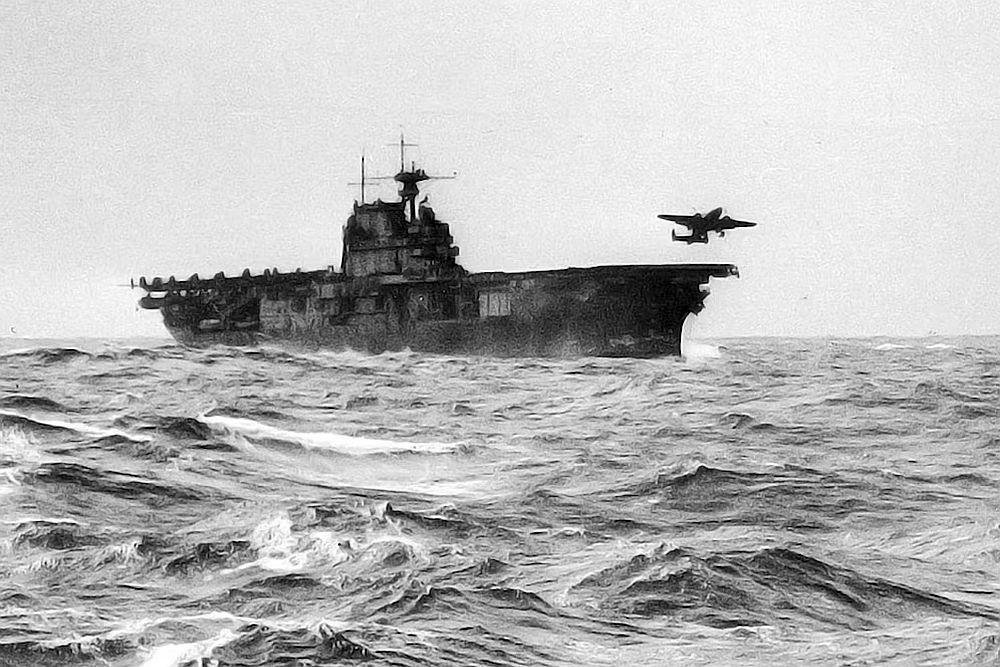
The Battle of Midway, fought between June 3 and 7, 1942 by American and Japanese fighter planes launched from aircraft carriers, was one of the most important naval battles of the Second World War. This was just six months after the Japanese air raid on Pearl Harbor when almost all the American battleships of the US Pacific Fleet had either been sunk or severely damaged. After this defeat, American morale was at its lowest. The Americans were devastated and were drawn into World War II by the surprise Japanese attack on Hawaii. They needed a quick victory, but for that they would have to wait until April 1942. On April 18, Lieutenant Colonel Doolittle, with 16 North American B-25 Mitchell bombers launched from the aircraft carrier USS Hornet (CV-8), carried out successful bombing raids on Tokyo and other important Japanese cities. Although the damage to Japan's cities was extremely minor, the Doolittle Raid was a huge morale boost for the Americans.
The Japanese forces had been very successful from early December 1941 to April 1942, achieving many of their tactical war objectives. To obtain raw materials for an independent and self-sufficient Japanese empire, they had rapidly occupied British Malaya, Singapore, the Dutch East Indies, the Philippines, northern New Guinea and several American islands in the Pacific. To secure the conquests and defend them effectively, it was necessary to conquer several strategically located islands in the Pacific. To isolate Australia and New Zealand, all of New Guinea, Samoa, New Caledonia and Fiji would also have to be seized. Because the Americans won a strategic and moral victory at the Battle of the Coral Sea, the invasions of South New Guinea and Nauru had to be suspended.
Japanese expansion in the first half of 1942 Source: Bert Heesen/TracesOfWar
The Commander-in-Chief of the Imperial Japanese Navy, Admiral Isoroku Yamamoto, was strongly in favour of immediately expanding the defensive belt around the conquered territories in the Pacific by seizing the Midway Islands and the Aleutians in southwestern Alaska. He already had operational plans available for this under the code names MI (Midway Islands) and AL (Aleutians). He hoped to do a double whammy by also forcing the US Pacific Fleet into a battle in which the American war fleet were to be destroyed. The General Staff of the Japanese Navy, led by Admiral Osami Nagano, preferred to first isolate Australia and New Zealand by conquering the aforementioned islands. The Imperial Japanese Army preferred to conquer as many areas in China as possible. The Doolittle Raid made it clear to all Japanese military and political leaders that Yamamoto must be right. Moreover, as a direct result of Japan’s strategic defeat in the Battle of the Coral Sea it was necessary to cease further conquests in the South Pacific, at least for the time being. Yamamoto was given the green light to carry out his plans.
Japan's Plans of Attack
Typical feature of all Japanese naval plans during the Second World War was their extreme complexity. Yamamoto's plan to both capture Midway and the Aleutians and as well as to destroy the remaining American Pacific Fleet was no exception. However, the plans were based on incorrect information. According to Japanese naval sources, both the American aircraft carriers USS Lexington (CV-2) and USS Yorktown (CV-5) had been sunk during the Battle of the Coral Sea. In fact, the Yorktown arrived at Pearl Harbor badly damaged on May 27, 1942, but three days later sufficient repairs enabled the ship to be operational. The Japanese correctly assumed that the Lexington's sister ship, USS Saratoga, was under repairs on the American west coast. Moreover, they could disregard any of the battleships that were put out of action at Pearl Harbor. Effectively, they only expected opposition from the aircraft carriers USS Hornet (CV-8) and Enterprise (CV-6).
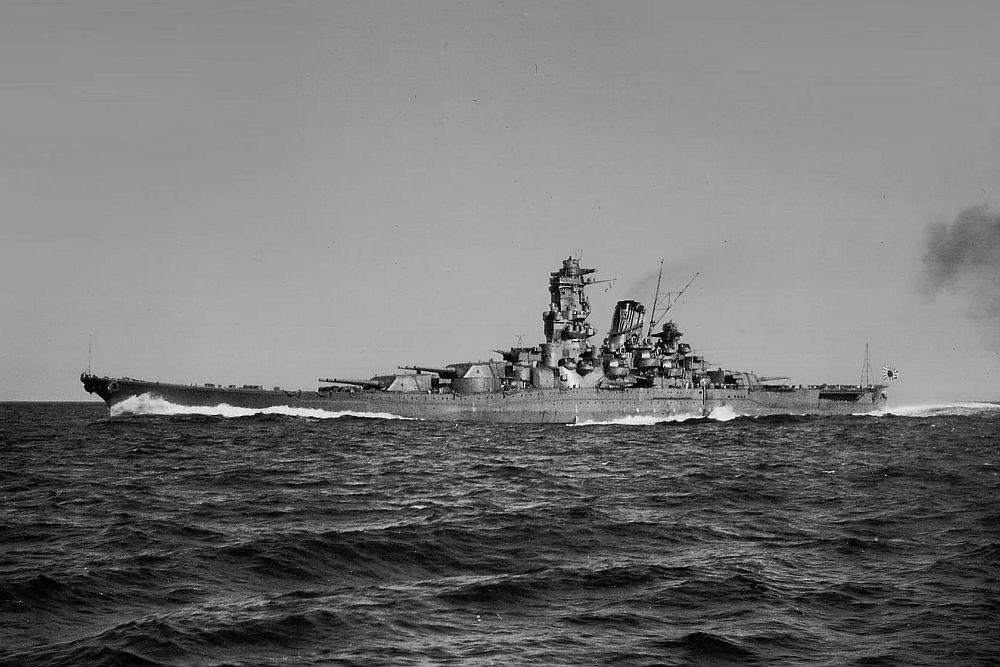
Several hundred miles behind Nagumo's attack fleet would be the First Fleet Main Force. This battle fleet should destroy the US Pacific Fleet once it fell into Nagumo's trap. The battle fleet included the new battleship Yamato (1940), which also served as the flagship of the commander of the fleet, Rear Admiral Gihachi Takayanagi, and the commander of the entire combined fleet, Admiral Yamamoto himself. The Yamato was the largest battleship in the world with a standard displacement of 65,000 tons and with a primary armament of nine 46cm guns. Furthermore, the battle fleet consisted of the battleships Mutsu (1920) and Nagato (1919), the light aircraft carrier Hosho (1921), a light cruiser, nine destroyers and two seaplane motherships.
The invasion of the Aleutians would be carried out by the Northern Force under the command of Vice Admiral Moshiro Hosogaya. This was assembled around the Second Carrier Striking Force, which consisted of the light aircraft carriers Ryujo (1931) and Junyo (1941) and escorted by three heavy cruisers and five destroyers. The landing force for Attu Island, consisting of 1,200 Imperial Japanese Army troops aboard a transport ship, was supported by four destroyers and a minelayer. For the invasion of Kiska Island, 550 marines and 700 sappers were embarked on two transport ships escorted by two light cruisers, an auxiliary cruiser, three destroyers and three minesweepers. If the American fleet were to head north to prevent the invasion of Attu and Kiska, it had to be held up or even destroyed by a fifth fleet. This Aleutian Support Force, or Fifth Fleet, consisted of the battleships Fuso (1914), Hyuga (1917), Ise (1916) and Yamashiro (1915), two light cruisers, twelve destroyers and two auxiliary ships and was part of the Northern Force. The combined fleet was placed under the command of Vice Admiral Shiro Takasu. Should the American fleet become trapped and come under fire from the Main Force, the Fifth Fleet would have to reinforce Takayanagi's ships and vice versa.
As for the attack on Midway itself, the Japanese deployed fifteen Japanese submarines that were instructed to take up positions on June 2 and cover all possible routes that the enemy could choose from to avoid any surprise from the Americans. The operations of the submarines, which were divided into three divisions and called Advanced Force, were coordinated by Vice Admiral Teruhisu Komatsu from the light cruiser Katori (1939), which was located near Kwajalein, one of the Marshall Islands. In case of emergency, operations MI and AL could be supported by land-based fighter aircraft. These Shore Based Air Forces were located on the Marshall Islands of Wotje, Kwajalein, Aur and Jaluit and Wake Island.
On June 3 or 4, Nagumo's First Carrier Strike Force was to attack Midway and at the same time Hosogaya's Northern Force was to attack the Aleutians. All in all, this was a very complicated plan that could only succeed if the various fleet components worked very well together, which in turn depended on good communication. Moreover, the plan would only have a chance of success if the Americans would respond as Yamamoto predicted and if the element of surprise remained present. However, to be able to close the trap at any opportunity that presented itself, Yamamoto had ordered radio silence between Nagumo's carrier fleet and the other naval units. This was completely at odds with the necessary communication requirements amongst the various fleet components. On May 27, the Japanese ships left their bases in Japan and the Mariana Islands.
Overview of developments of The Battle of Midway Source: Bert Heesen/TracesOfWar
American Countermeasures
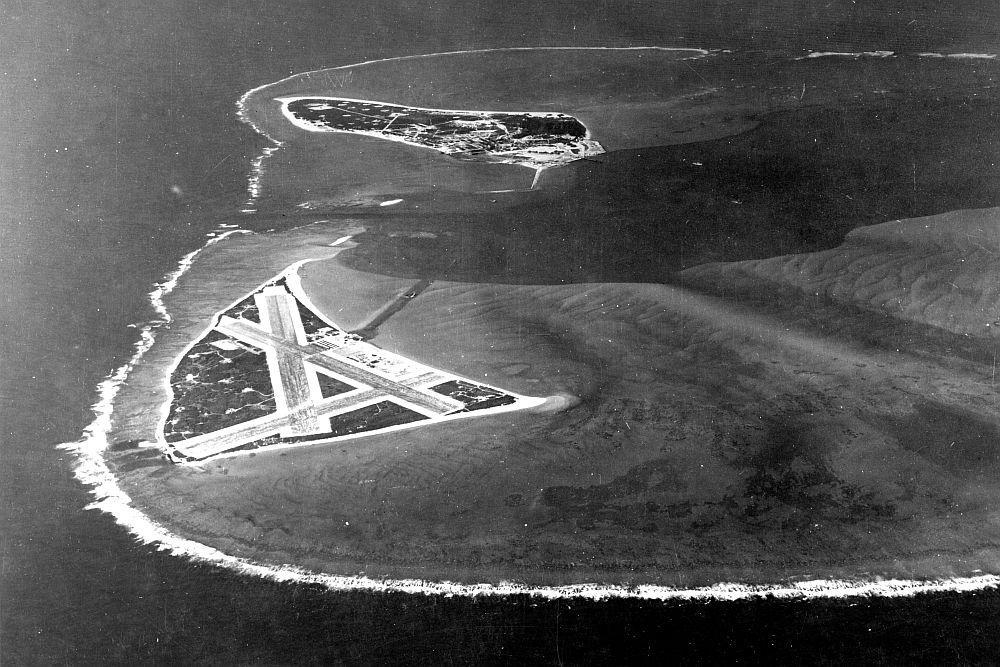
Midway is an atoll that geologically belongs to the Hawaiian archipelago and located 1,300 nautical miles from Honolulu and about 2,250 nautical miles from Tokyo. It consists of three islets, Eastern Island, Sand Island and Spit Island, that are situated in a lagoon surrounded by coral reefs. The combined land area is 6.2 square kilometres. Midway has a subtropical climate, and the islets are nowhere more than three meters above sea level. The uninhabited islands were discovered on July 5, 1859, by the American captain N.C. Brooks who named them the Middlebrook Islands. On July 28, 1867, the archipelago was annexed into the USA by Captain William Reynold of the US Navy. Two years later, a channel was excavated allowing ships access the lagoon and dock at jetties constructed on Eastern Island and Sand Island. From 1899 onwards, the islets, together with Guam and Wake, became important stops on the sailing route from the United States to the Philippines. From that time on, the nickname Midway became the official name for the atoll. On January 20, 1903, President Theodore Roosevelt placed Midway under the control of the US Navy. In the same year a trans-Pacific telegraph cable station was built on Sand Island and the first permanent residents appeared. In 1935, Pan American Airways established a seaplane base and built a hotel on Sand Island.

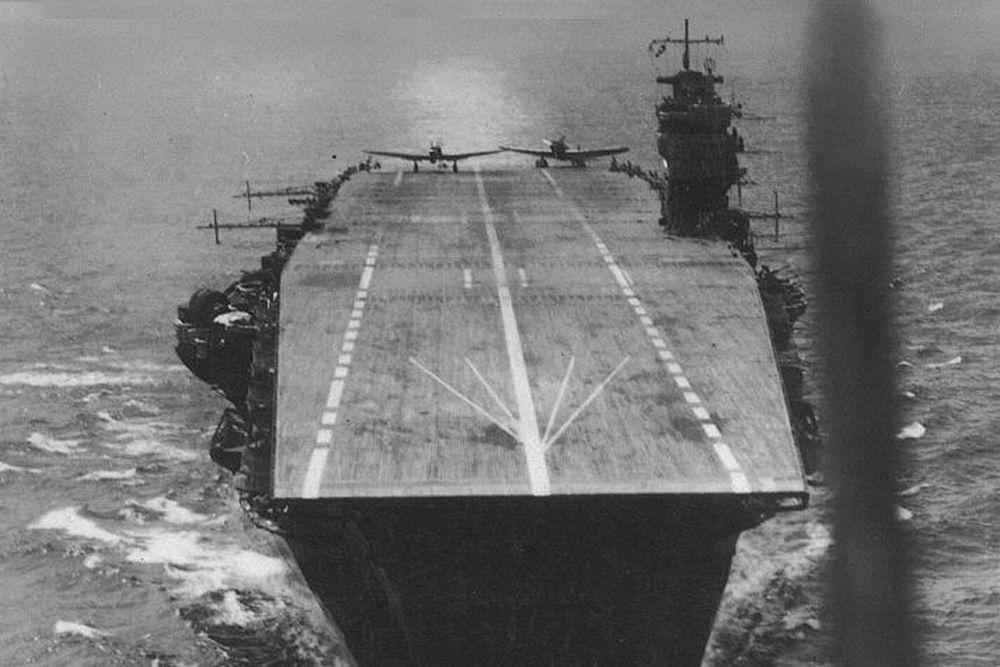
In early April 1942, American cryptanalysts from the Office of Naval Communication, led by Lieutenant Commander Joseph John Rochefort, succeeded in cracking a Japanese operational naval code. With the help of British and Dutch cryptanalysts, the Americans were able to decipher approximately 85 percent of Japan's Naval Codebook D-code. This particular code, which the Americans called the JN-25B code, was used by the Japanese navy in about half of their radio messages. As a result, the commander of the US Pacific Fleet, Admiral Chester W. Nimitz, became aware of Yamamoto's plans by the end of May. To put up any meaningful resistance against the Japanese superior forces, Nimitz needed all available aircraft carriers. He immediately availed of Task Force 16 (TF16), which consisted of the Yorktown-class aircraft carriers USS Enterprise (CV-6) and USS Hornet (CV-8), five heavy and one light cruisers and nine destroyers. TF16 was normally commanded by Vice Admiral William Halsey, but he was admitted to the military hospital in Pearl Harbor with a serious skin disease. He then appointed his commander of his accompanying cruisers and destroyers, Rear Admiral Raymond Ames Spruance, as his replacement. The two aircraft carriers of TF16 jointly had 70 Douglas SBD Dauntless dive bombers, 28 Douglas TBD-1 Devastator torpedo bombers and 54 Grumman F4F Wildcat fighter aircraft.
Nimitz needed a fourth aircraft carrier to match Nagumo's force and decided that Midway itself should become an unsinkable aircraft carrier. He expanded the air fleet on the atoll with 30 PBY Catalina flying boats and 6 Grumman TBF Avenger torpedo bombers. The US Army Air Force also supplied 17 Boeing B-17 "Flying Fortress" long-range bombers and four Martin B-26 Marauder bombers, which were stationed on Eastern Island.

By May 28, TF16 had left Pearl Harbor and headed for a position 350 nautical miles northeast of Midway. Two days later, TF17 departed for the same position, dubbed "Point Luck" by the Americans, where the two task groups rendezvoused on June 2, 1942. Upon TF17's arrival, Rear Admiral Fletcher assumed tactical command of both Task Forces. He had been under strict orders not to interfere with the Japanese attack on the Aleutians and to concentrate on Nagumo's four Japanese aircraft carriers. Vice Admiral Komatsu's Japanese submarines only took their position after TF16 and TF17 had done so, causing the Japanese to miss the American war fleet. At the same time as the American carriers, 16 American submarines took up positions around Midway as a defensive line.
From June 2, the Yamato's powerful radio antennas intercepted many American messages indicating increased activity by both American submarines and carriers. However, Yamamoto did not pass this on to Nagumo because he wanted to maintain radio silence to avoid giving away the presence of his battle fleet. On the other hand, Nagumo himself could not receive the American long wave radio messages and was therefore unaware of the movements of the American warships.
Before the Battle
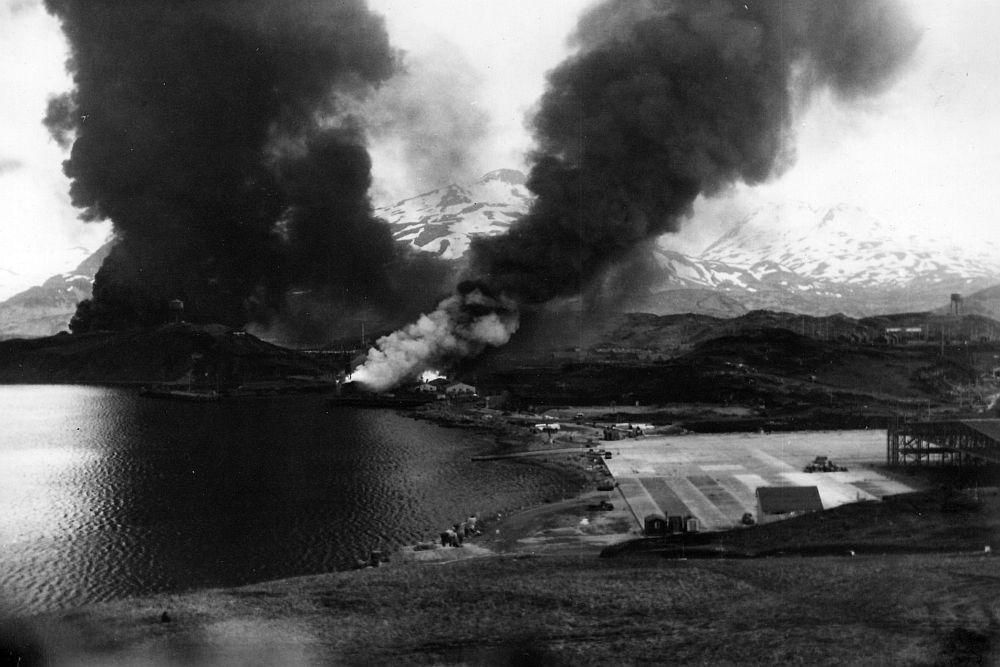
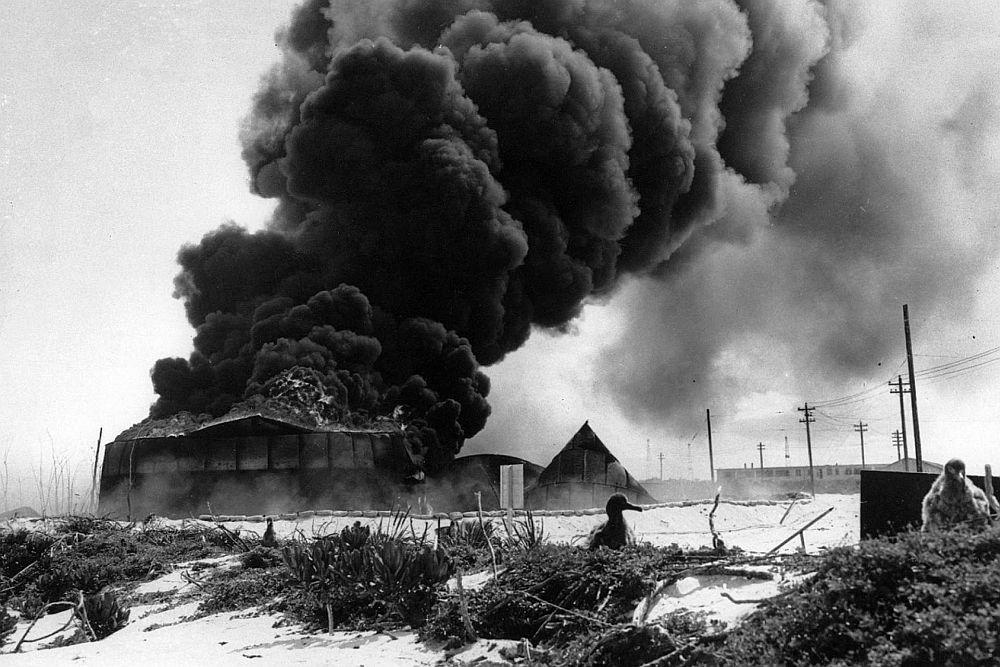
On June 3, 1942, Vice Admiral Hosogaya launched the first wave of attacks on Dutch Harbor with multiple Kate and Val bomber aircraft from the light aircraft carriers Junyo (1941) and Ryujo (1931). Because Nagumo's First Carrier Strike Force had lost almost a day in getting the ships into position, the MI and AL operations were no longer synchronised. For a long time, historians wrongly assumed that the Japanese attack on the Aleutians was therefore a diversionary manoeuvre, but Hosogaya simply carried out his orders. Half of the Japanese fighter planes could not find their target due to fog and darkness and were forced to return to the aircraft carriers. Only 17 Japanese aircraft reached Dutch Harbor at 0545, but they were immediately fired upon by anti-aircraft guns and attacked by fighter planes of the 11th Army Air Force. The Japanese dumped their bombs prematurely and were only able to launch a single attack with their machine guns. As a result, the American base suffered very little damage.
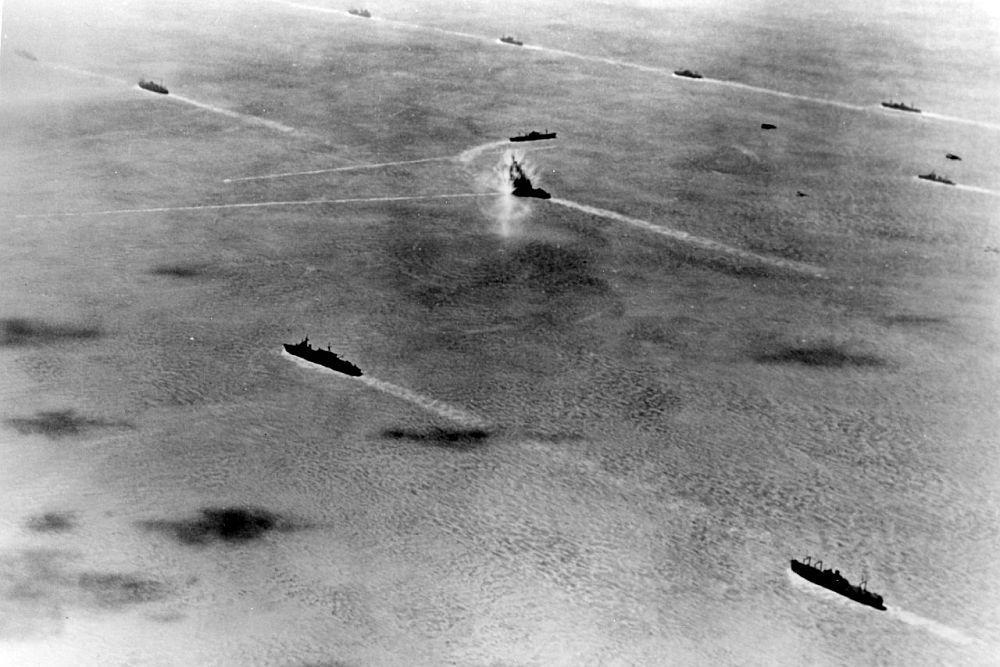
A few days earlier, on June 3 at 1230, nine American B-17 long-range bombers took off from Midway and three hours later bombed the Japanese transports of Vice Admiral Kondo's Midway Striking Force. The “Flying Fortresses”, however, met with fierce anti-aircraft gunfire from the accompanying Japanese warships. While the American pilots claimed some hits, the bombs had caused no damage.
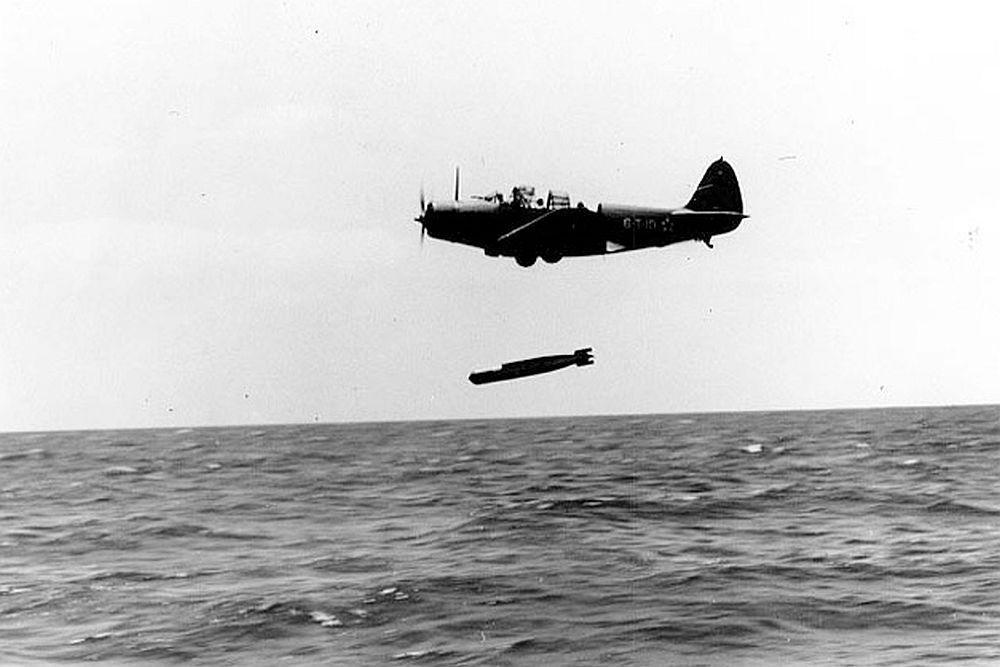
The first damage to Japanese ships was inflicted a few hours later by four Consolidated PBY Catalina flying boats from Patrol Squadron 4, stationed on Midway. On the night of June 3 to 4, at 0100, one of the American flying boats dropped an outdated model 1 Mk XIII torpedo aimed at the supply vessel Akebono Maru. The torpedo struck the 10,182-ton ship in the bow near the anti-aircraft ammunition magazine, creating a ten-meter wide hole in the hull. By closing the affected compartment with watertight bulkheads, the Akebono Maru could be saved, after which the ship returned to Japan under its own power.

Overview of The Battle of Midway from 0400 to 0800. Source: Bert Heesen/TracesOfWar
Aircraft Carrier Battle near Midway
Vice Admiral Nagumo had held more than half of his available aircraft in reserve, in line with Japanese aircraft carrier doctrine. In preparation for the upcoming events, the torpedo bombers on board his carriers were equipped with torpedoes against enemy ships whereas the dive bombers were still waiting to be armed. At 0715, the commander of the Japanese carrier fleet was informed by his pilots that a second air attack would be necessary on Midway. Nagumo therefore had his torpedo bombers and dive bombers equipped with high-explosive bombs against land targets. Moments later, the Japanese ships were again attacked by American aircraft from Midway. As Japanese fighters kept the US Marines' Vought SB2U Vindicator reconnaissance bombers and the US Navy's Grumman Avenger torpedo bombers from hitting their targets, Nagumo's decision to attack Midway again was confirmed. However, by 0800 the delayed reconnaissance aircraft of the Japanese heavy cruiser Tone reported it had spotted a large American war fleet heading east. Nagumo immediately ordered his planes to be equipped with torpedoes and armour-piercing bombs against surface ships.
Shortly after dawn on June 4, an American Catalina reconnaissance flying boat had spotted the Japanese aircraft carriers and Japanese aircraft heading for Midway. Spruance instructed TF16 to set course towards the Japanese aircraft carriers. Around 0600, Fletcher, with the knowledge of Nimitz, had Spruance send as many planes into the air as possible from the USS Hornet (CV-8) and the USS Enterprise (CV-6). An hour later, 70 Dauntless dive bombers, 28 Devastator torpedo bombers and 20 F4F Wildcat fighters were heading west toward the Japanese carriers. Fletcher himself had the planes of the Yorktown wait another hour as he was waiting for further information from the reconnaissance planes. Once he received their conformation, the Yorktown launched 17 dive bombers, 12 torpedo bombers and 6 fighters. However, the Hornet and Enterprise flying groups had no experience fighting enemy aircraft carriers and quickly split into small groups rather than organised formations. The various groups had problems locating the Japanese ships because Nagumo had temporarily changed course. Most of the dive bombers missed the Japanese ships and some then flew towards Midway and some towards the open sea. The Wildcats all followed the dive bombers.
Still, the sacrifice of the American torpedo bombers had not been in vain. When several formations of Dauntless dive bombers from the USS Enterprise and the USS Yorktown at 1020, finally discovered the Japanese aircraft carriers, they had drifted apart to avoid the American torpedoes. Furthermore, the Zero fighters had descended almost to wave crest height to intercept the Devastators and all Japanese anti-aircraft machine guns had their barrels pointed downwards for the same reason. Moreover, in all that time Nagumo had not had any opportunity to launch aircraft for a counterattack. The planes that had returned from the attack on Midway were still on the flight deck, being supplied with fuel and ammunition, whereas the other planes were fully fuelled and ready in the hangars below.
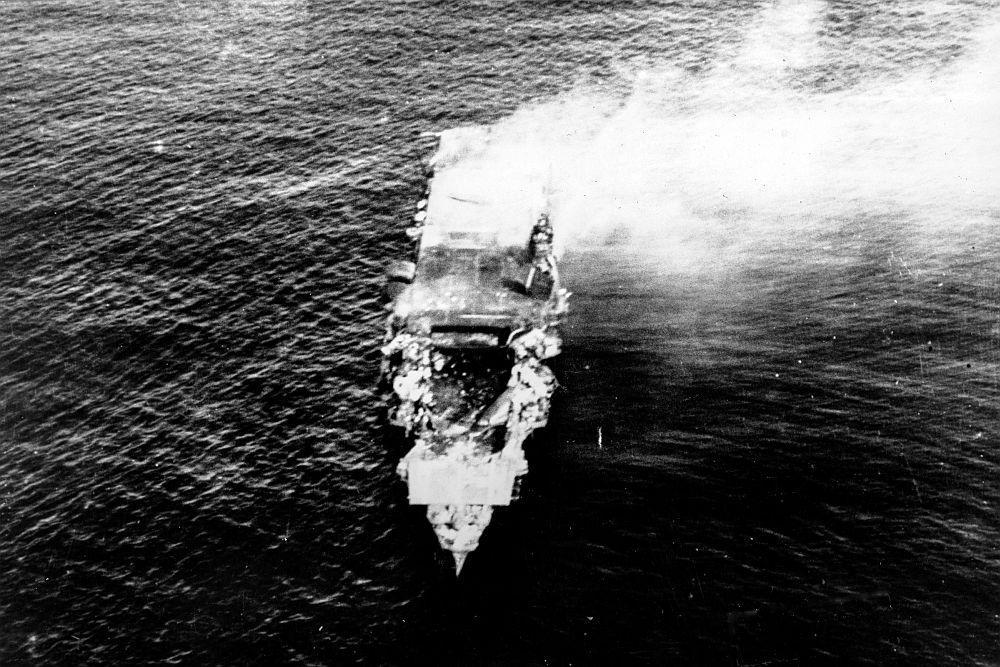
Several groups of Dauntless dive bombers, which had searched for the Japanese aircraft carriers despite their impending fuel shortages, now approached from different directions and attacked in four groups. The Kaga received four direct hits on the flight deck and within minutes had turned into an uncontrollable sea of fire. The Soryu suffered three direct hits, one of which penetrated the hangar below the flight deck where it exploded. The two other hits exploded on the packed flight deck. Fires also broke out onboard this carrier that could not be extinguished. Vice Admiral Nagumo's flagship, the Akagi, received a direct hit on the flight deck amidships after which the bomb penetrated the hangar and exploded. The explosion detonated a large number of torpedoes, causing further explosions and a large number of fires.
Nagumo had to abandon his doomed ship and transferred his flag to the cruiser Nagara. The attack by a few other Dauntless dive bombers on the Hiryu yielded no hits and this aircraft carrier was the only one able to escape for the time being. Within five minutes, three of the four Japanese aircraft carriers were put out of action. Because the hangars and flight decks were full of fully fuelled aircraft and bombs were scattered everywhere after the hasty change of aircraft armament, the fate of the Japanese carriers was quickly sealed.
Overview of the Battle of Midway between 08:00 and 10:30. Source: Bert Heesen/TracesOfWar
Japanse Counterattack
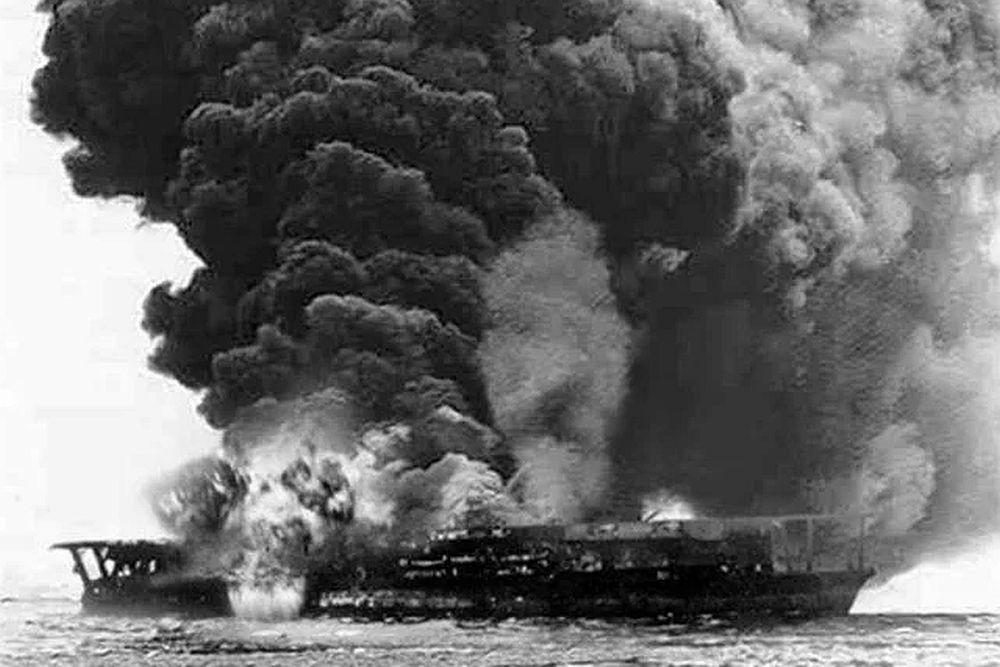
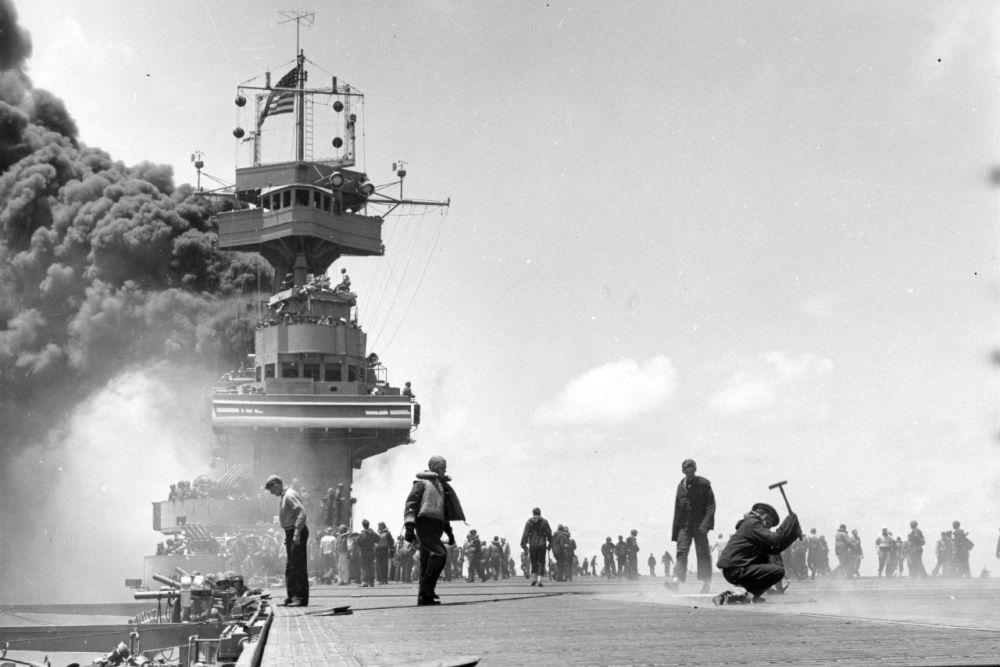
At 1100, the Hiryu launched 18 Val dive bombers and several Zeros against the American carriers. At the same time, USS Yorktown sent some reconnaissance aircraft into the air to determine the Hiryu's position. Fifty minutes later, the last remaining Kate torpedo bombers of the Hiryu were launched. At exactly 1200, the Yorktown's radar picked up the Japanese Vals and her remaining 19 Wildcats were immediately launched, destroying 10 Japanese dive bombers. Two more Japanese aircraft fell prey to the anti-aircraft fire of the Yorktown. However, the remaining six Vals were able to score three direct hits on the American aircraft carrier. One hit the Yorktown on the flight deck, the next fell into the smokestack and the explosion knocked out the remaining six operating boilers by which the ship slowed to a stop. The third Japanese bomb penetrated four decks and exploded inside the ship, again causing extensive damage to the frames. The Japanese pilots of the successful aircraft reported that one of the American aircraft carriers had been sunk.
Overview of The Battle of Midway between 1030 and 1750. Source: Bert Heesen/TracesOfWar
After the Battle
At 1913 hrs, the Soryu sank and less than twelve minutes later two explosions tore apart the burned-out wreck of the Kaga, disappearing into the ocean within minutes. However, some Japanese historians, as well as veterans, claim that both aircraft carriers were sunk by Japanese destroyers with torpedoes so that the burning and smoking wrecks would not be an obstacle to a possible night operation. At 0520 on June 5, the Akagi sank after the aircraft carrier was hit by three torpedoes fired by Japanese destroyers on Yamamoto's orders. The Hiryu sank at 0912 that same morning. The survivors from the aircraft carriers were picked up by destroyers and transferred to the battleships Haruna (1915) and Kirishima (1915). Together with the four aircraft carriers, 2,181 crew and all aircraft on board were lost.
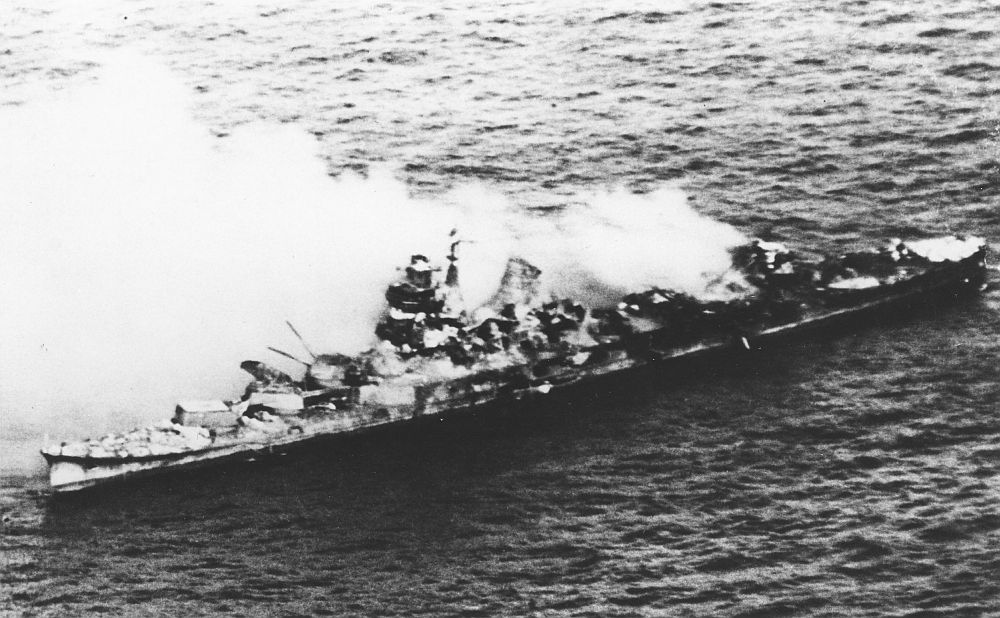
Rear Admiral Spruance set out on a daytime pursuit on 5 June to inflict as much damage as possible on the retreating Japanese fleet. However, during daylight his reconnaissance aircraft were unable to detect any Japanese warships. During the night of 5–6 June, the American submarine USS Tambor (SS-198) located an unknown group of warships. These were the retreating cruisers and destroyers that Yamamoto had dispatched to Midway. Once the Japanese cruisers had spotted the submarine, they separated, in accordance with protocol, to avoid any torpedoes. In the process, the heavy cruisers Mogami (1934) and Mikuma (1934) collided. The Mogami suffered heavy damage to her bow when she hit her sister ship Mikuma on the port side, rupturing oil tanks. The two damaged cruisers were forced to proceed at slow speed, escorted by the two destroyers Arashio (Dai-78) and Asashio (Dai-75) while the two remaining heavy cruisers maintained their course and speed.
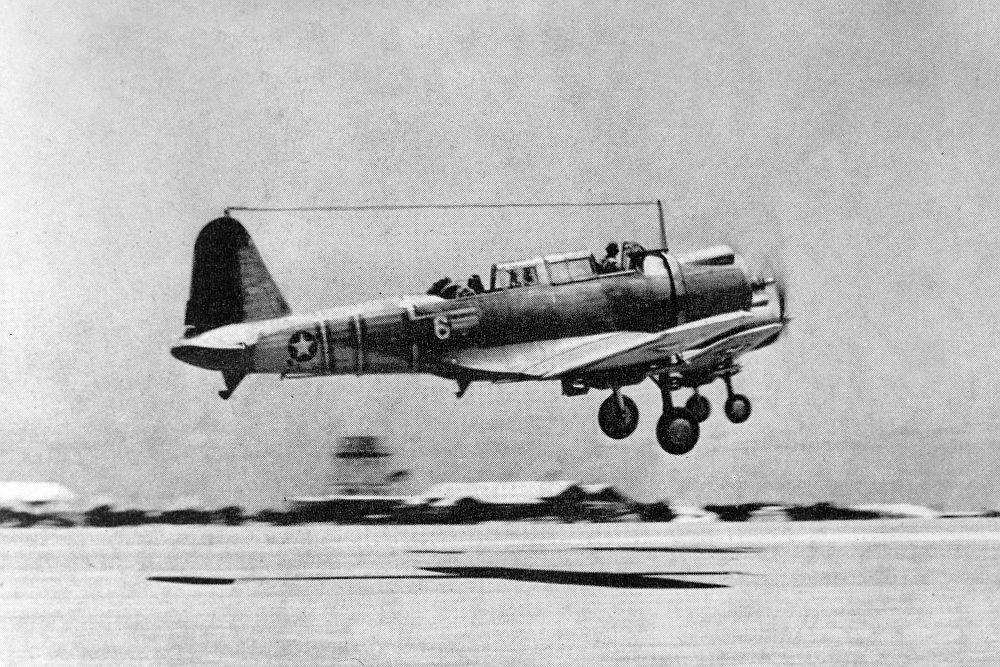
During the morning of 6 June, the crippled cruisers were repeatedly attacked by B-17s and Dauntless and Vindicator dive bombers from Midway, which inflicted near misses on the Mikuma and Mogami, as well as on the two destroyers. Later in the morning, the Japanese ships were attacked by Dauntless dive bombers from Enterprise and Hornet. The heavy cruisers were hit by five bombs each, and the destroyers each received a single direct hit. The Mikuma was abandoned and later sank. The remaining three ships, although damaged, were able to rescue 240 of the Mikuma's crew and escape to Wake Island. The Mikuma had suffered 700 casualties, and the Mogami 92. The badly damaged Mogami would remain out of service for over a year.
Sinking of USS Yorktown
After Captain Buckmaster had given the order to abandon the USS Yorktown, the 2,000-plus crew disembarked. By 1800 hrs on June 4, 1942, the escort ships that had taken the crew of the crippled carrier were heading east to transfer the crew to the cruisers. Only the destroyer USS Hughes (DD-410) remained behind, with orders to sink the carrier if fires broke out again. Nothing happened, however, and the carrier's list did not worsen. Buckmaster, who by now had been transferred to the heavy cruiser USS Astoria (CA-34), suggested to Fletcher that an attempt be made to salvage the carrier. Fletcher agreed, and a team of volunteers was assembled under the command of Captain Buckmaster himself.
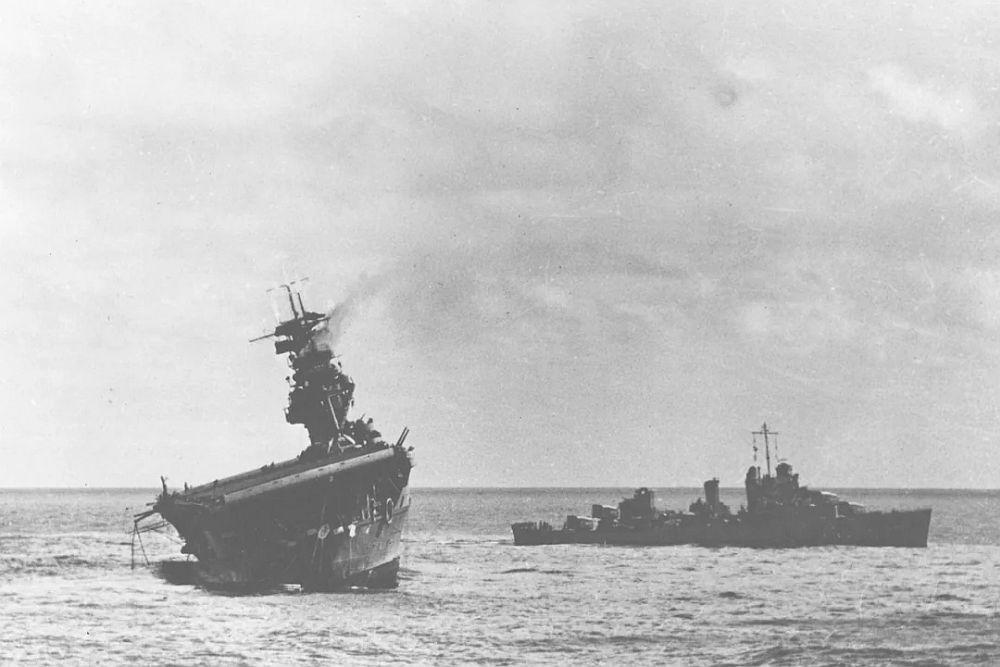
That same day, the fleet tug USS Vireo (AT-144) was ordered to sail from Pearl Hermes Reef to the Yorktown. At 1135, the rescue vessel arrived and took the carrier in tow toward Pearl Harbor. Vireo was not sufficiently powerful to tow Yorktown and could only make 2 knots and barely keep her course. During the afternoon, destroyers USS Gwin (DD-433) and USS Monaghan (DD-354) arrived, taking over the protection of USS Yorktown, along with Hughes. During the night of 5–6 June, destroyers USS Hammann (DD-412), USS Balch (DD-363), and USS Benham (DD-397) arrived. The Hammann carried Captain Buckmaster's 160-man salvage party, which boarded Yorktown at first light at 0415. The Hammann herself was lashed to the starboard side of the carrier to keep her on course and to provide power.
The power provided by the Hammann enabled USS Yorktown's (CV-5) trim pumps to be brought to bear, virtually eliminating the ship's list. To maintain the carrier's balance, the weight at port side was removed as much as possible, including the 5-inch anti-aircraft guns, an anchor, and several lifeboats. The bilge pumps were then brought to bear to pump the excess seawater out of the wreck. By noon, all remaining fires had been extinguished, the ship's list had been largely eliminated, and the jammed rudder had been moved to the centre position. The boiler rooms had been pumped out, and the salvage crew was preparing to make an initial attempt to get some of the boilers steaming.
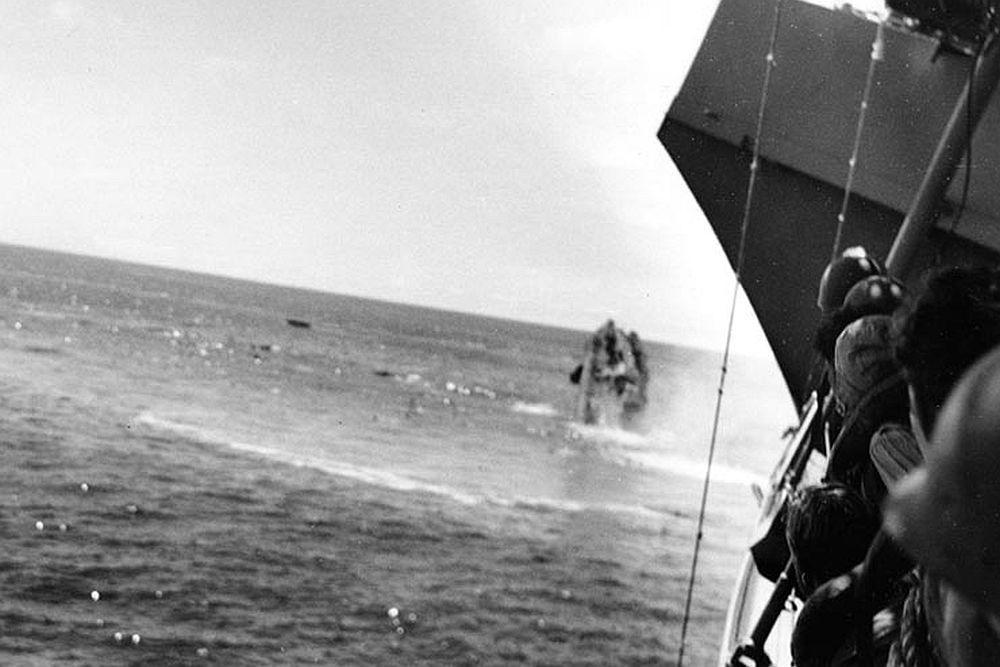
At approximately 1300, I-168 arrived and Tanabe positioned his submarine into the circle of American destroyers. Half an hour later, he came to periscope depth and saw USS Yorktown and USS Hammann slowly passing by. He launched four torpedoes and immediately descended to greater depth. The first torpedo passed under the Hammann and exploded against the starboard side of the Yorktown. The second torpedo struck the Hammann amidships, splitting the destroyer in two and causing it to sink rapidly. The third torpedo struck the carrier on the waterline off the bridge island and the fourth torpedo passed astern. At soon as the Hammann disappeared under water, a violent explosion occurred on board for reasons still unknown. The underwater explosion could have been caused by a torpedo from the destroyer itself or by exploding depth charges. However, the depth charges had been secured before USS Hammann passed alongside USS Yorktown and had been checked shortly before the Japanese torpedoes struck. The shock wave killed many of the drowning crew and caused further damage to the Yorktown. Of the 192 crew members of USS Hammann, 80 were killed.
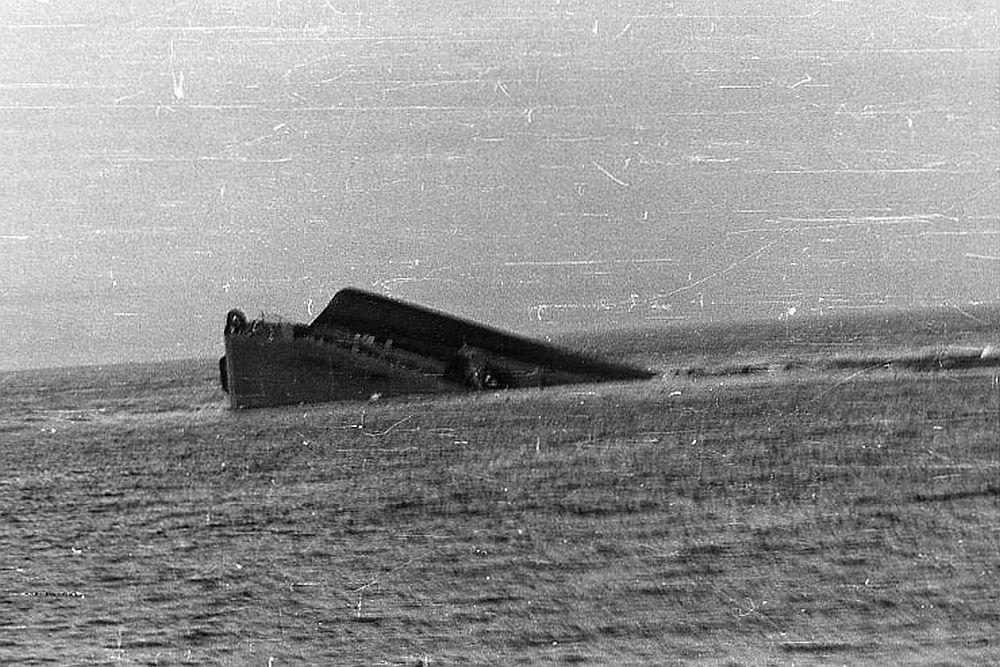
USS Yorktown remained afloat for hours with a 17-degree list to port. However, during the night of June 6–7, 1942, the badly damaged carrier began to list more and more, and at 0500 the carrier rolled over and began to sink. A little less than half an hour later, the Yorktown had disappeared into the depths of the Pacific Ocean.
Epilogue
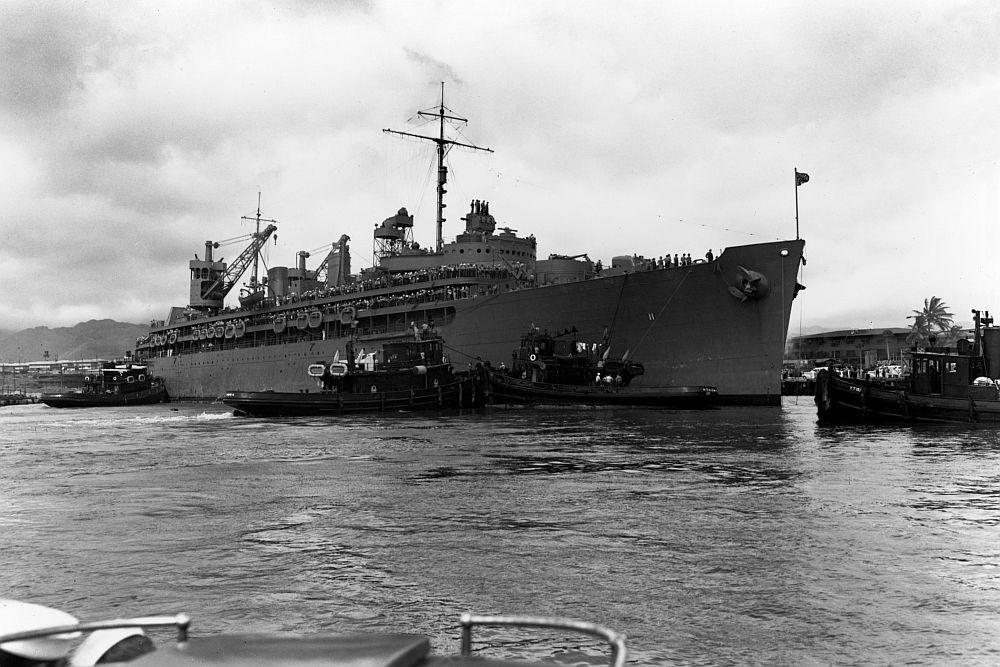
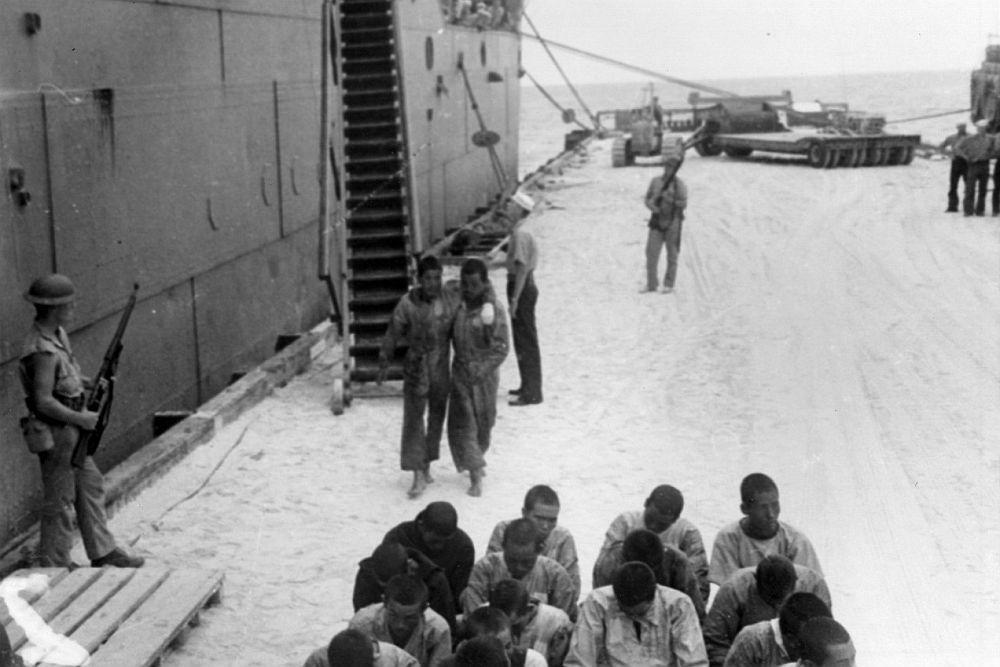
The survivors of the Yorktown and the Hammann were transferred to the submarine carrier USS Fulton (AS-11). The carrier arrived at Pearl Harbor on June 8, 1942, to disembark the survivors. On June 9, the submarine USS Trout (SS-202) rescued two survivors from the Japanese heavy cruiser Mikuma. Ten days later, the destroyer USS Ballard (AVD-10) picked up 35 Japanese survivors from the carrier Hiryu after receiving a report of a PBY Catalina flying boat. On June 21, another PBY Catalina rescued the two crewmen of a Devastator torpedo bomber from Enterprise 360 nautical miles north of Midway. These were the last survivors of The Battle of Midway to be rescued.
Even though Admiral Isoroku Yamamoto had 162 warships at his disposal for the MI and AL operations, he was unable to achieve victory in the Battle of Midway. Afterwards, many studies and analyses were conducted on the course of the battle. The most general conclusions are that Yamamoto had made three major mistakes:
- He had saddled Nagumo with two tasks that were difficult to combine: bombing Midway and taking out the American aircraft carriers. If he had let his battleships and cruisers carry out the bombing of Midway, Nagumo would have had his hands free.
- His second major mistake was to split his attack force into several groups that were not allowed to have almost any radio contact with each other. The successful attacks by the Americans, who always kept their entire fleet together, proved that a concentration of ships was more powerful than squadrons operating independently of each other.
- The third mistake was that he had failed to determine the actual strength of the American carrier fleet. He assumed that he would only encounter the USS Enterprise and USS Hornet as opponents, since the USS Yorktown was believed by the Japanese to have been sunk in the Coral Sea. Furthermore, he had not considered that Nimitz would use Midway itself as a fourth carrier. This negated his supposed superiority with Nagumo's four carriers.
The Americans, led by Admiral Nimitz, had remained calm. Based on their essential information, by breaking the Japanese operational naval code, they were not tempted to intervene with their carriers in the Japanese attack in Alaska or the attack on Midway. The three Yorktown-class carriers remained focused on the Japanese carriers and, with a bit of luck, were able to strike the first blow. Rear Admiral Spruance wrote in the preface to Fuchida and Okumiya's book: "In reading the account of what happened on June 4, I was more than ever struck by the role that luck or misfortune sometimes plays in a tactical encounter. The authors give us undeserved credit for choosing the moment to attack the Japanese carriers at precisely the moment when they were at their greatest disadvantage. My personal credit has only been that I was keenly aware of the urgent need for surprise and that I had a strong desire to strike the enemy carriers with our full force as soon as we could reach them."
The enormous significance of the American victory at Midway could only be fully appreciated years later. The four aircraft carriers and the 248 aircraft lost by the Japanese could hardly be replaced. The Japanese navy could also not recover from the loss of more than 2,000 experienced carrier crews and pilots. The Battle of Midway became one of the most important turning points of World War II and the most important turning point in the Pacific War. Or as Captain Fuchida put it: "the catastrophe of Midway marked a definitive turning point in the tide of the war in the Pacific. From that time on, that tide swept Japan inexorably toward its final capitulation."
References
Sources
- Fuchida, M. - De slag bij Midway
- Ireland, B. - Vliegdekschepen
- Macintyre, D - Famous Fighting Ships
- MacIntyre, D. - Vliegkampschepen
- Zich A. - De rijzende zon